
Thinking of starting a small online shop business is pretty inspiring. Once you figure what to sell and who to sell it to, where to host the shop, which script to use, once you come up with the domain name – you are done with the big strategy. But then inevitably you get to a point when you ask yourself questions: “How to make it all work from the technical side? How to install all you need and configure it?”
Installing new scripts may look scary for a beginner. Getting all the databases set up and configured, defining all the folders, uploading installation binaries and so on can become painful if you have never done this before. But what if you are not even sure if the script is worth installing it the hard way? The answer is simple – you don’t have to install most popular scripts manually with us, we have taken care of it for you. We have prepared a special application called Installatron that lets you install a number of scripts by making few clicks during literally 7-8 minutes.
What if you have never ever installed anything on a webhost at all? The answer is even simpler – here is a quick start to installing e-commerce applications using our Installtron.
Sitevalley ‘E-commerce’ hosting package comes with pre-installed osCommerce Shopping Cart, but in case you’re not satisfied with osCommerce we also offer quick and easy installations of CubeCart and PhpShop via Installtron (please check a special overview of these shopping carts which should help you make a decision).
So what is Installtron? It is a very friendly and powerful installation tool that lets you perform predefined installation in a mode of a wizard, which looks very similar to a regular installation wizard of a PC.
This guide will be handy not only for the owners of the ‘E-commerce’, but also for the owners of the ‘All Inclusive’ or any other hosting plan, as the installation of any application through the Installatron has the same simple and user friendly scheme. While this guide covers the installation steps of CubeCart, the procedure for PhpShop or osCommerce or any other type of application (CMS Joomla for example), will be very similar…
First of all you need to log into the Direct Admin control panel of your account and open Installtron. Normally you would use either http://yourdomain.com:2222 or http://yourserverIP:2222, where ‘yourdomain.com’ is your main domain name and ‘yourserverIP’ is the IP address of the server you are hosted on.
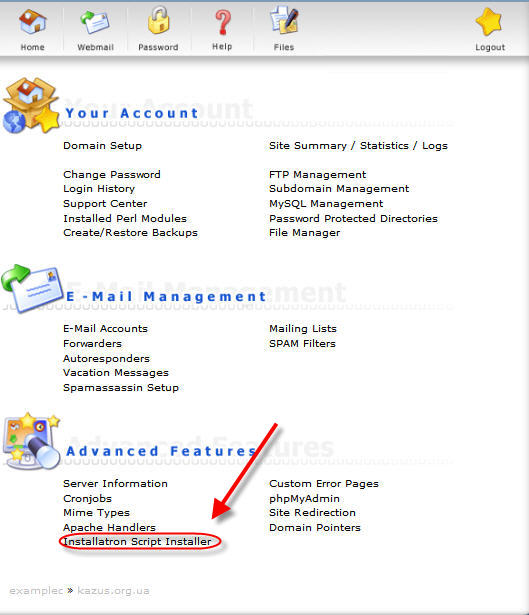
After you have logged into you Direct Admin control Panel, you need to click the ‘Installatron Script Installer’ button located in the ‘Advanced Features’ section as shown on the screenshot.
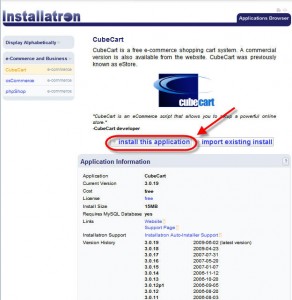
After the appropriate application (in our case it is a shopping cart CubeCart) is chosen you will be see some information, which includes some common properties, including application name, current version, cost, size, developer and community links, version history.
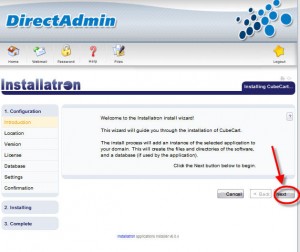
This guide aims at the fresh new installation so we will describe the ‘Install application’ option shown in the left screen-shot below. Of course you may also import the existing install, but the procedure for it isn’t described here. After clicking the “Install this application” button, you will see the install wizard welcome screen. Just click next to continue.
 |
 |
Now we will define the install location of the application inside your account. The first field you need to customize is the ‘domain’ one. This field defines the way CubeCart is accessed from the Internet, and also it defines the way the path to the CubeCart folder is defined from the server side.
In our example a sub domain was used. This is suitable if you have a general web site that and a store is just a section of it. In the screenshot below the domain is specified as http://cubecart.kazus.xxx/, which tells the Installatron that the CubeCart is to be associated with the mentioned sub domain. After the installation is done, we will be able to see the cart by typing http://cubecart.kazus.xxx/ in our browser.
Next field is ‘Path’. It defines the folder in which the CubeCart will be installed. Now, this needs some more detailed explanation. We have chosen the subdomain for the ‘domain’ field, which means that we have already created the folder ‘cubecart’ inside of the /public_html directory of our account when we were creating the sub domain. The fact that we have chosen the sub domain also means that the root folder for the installation is /public_html/cubecart/ by default. So if the field ‘Path’ is left blank the CubeCart application will be installed in the /public_html/cubecart/ folder. If the ‘Path’ field is left blank we will be able to see the shop by using the http://cubecart.kazus.xxx/ in the browser. By the way, the very same procedure applies to a regular domain like kazus.xxx: if you want to access the store by using the link http://kazus.xxx just leave the ‘Path’ blank.
Sometimes it is required to change the default path to something else. In the screenshot below we have specified path as ‘cubecart’. This means that the CubeCart will not be installed into the root folder of the sub domain cubecart.kazus.xxx, instead the folder ‘cubecart’ will be created inside of the root folder and the application will be installed into that folder. As it has already been mentioned, the root folder for the sub domain is /public_html/cubecart/, plus we have asked the Installtron to create the folder ‘cubecart’ inside of the root folder. As result we get the following folder for the installation of the application: /public_html/cubecart/cubecart. The store in such variation is to be accessed from the Internet by the following link: http://cubecart.kazus.xxx/cubecart/.
So go ahead and decide which domain you would like the CubeCart to be associated with, specify the domain in the ‘Domain’ field, and if you want the CubeCart to be opened by the simplest link to the domain (i.e. http://domain.com), just leave the path filed empty, otherwise specify the folder which the CubeCart should be put into in the ‘Path’ field.
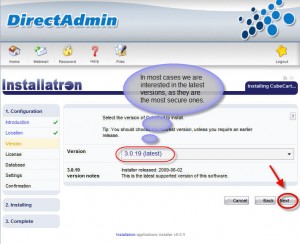
After the install location is defined, we need to choose the version we want to be installed. Generally, we would want the latest version available for two main reasons:
The Installatron will automatically prompt you with the latest version, so just press ‘Next’ as shown in the left screen-shot below.
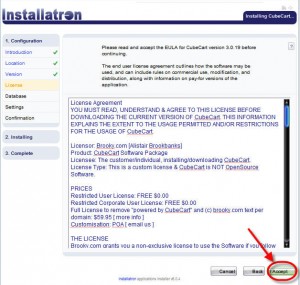
The next phase is reading and accepting the license. Make sure you are familiar with the license and agree to follow everything the agreement assumes. After done reading press ‘I Accept’ as it is shown in the right screen-shot below.
 |
 |
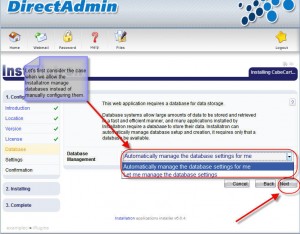
Here we move on to configuring the work with databases. To make the install as easy as possible you need to choose the automatic management of the databases in Installtron. Just choose the automatic option from the drop-down menu as shown in the left screenshot. If you wish to configure the data bases yourself then you are to choose the corresponding option from the same menu.
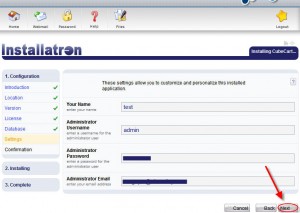
After you are done with the database management choice and pressed ‘next‘, you will be prompted to fill in the personal information for the CubeCart installation. This information will be used to create the default account, but of course it can be modified after the installation. You will be able to make necessary changes from the software administration area. Fill in the desired information and continue.
 |
 |
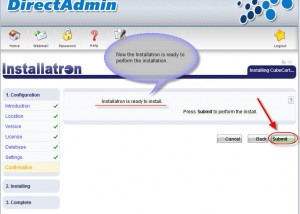
Well guess what?! We are almost done. All the info has been prepared and defined for the Installtron to successfully perform the installation. Just click ‘Submit’ and wait for about 5 minutes.
You should get windows similar to the ones shown in the screenshots below.
 |
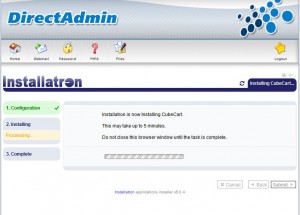 |
Well done so far! You have successfully installed the application. Now you can view the report of the installation. This report holds all the information about the installation, including all the important logging information and links. You don’t even have to save all this information as this window will be available any anytime from your Direct Admin control panel. You can open the Installtron any time and check all the necessary info about the installed application.
After you’re done either memorizing the info or writing it down in a notebook, you can proceed to using the software.
Sometimes you would want to introduce some changes to the installed application. The changes and operations that can be performed as easy as the setup itself using the Installtron are:
These operations can be performed directly from the Installtron. All you need to do is launch the Installtron and then go to ‘My Applications’ tab, choose the desired action for the appropriate application as shown in the screenshot below.
So far these are the simplest guidelines to install the desired applications using the Installtron that we have prepared for you. These applications can also be installed manually. The instructions for manual installation can be found at the developer’s pages.
This guide can be used for installation of any application available in Installtron.
Hopefully Installatron will make your hosting experience with us as pleasant as it can possibly be.


Quick Customer care response, accurate and broad assistance, easy to use client area.....


I am very happy with the service. I am with site valley for many years and at the present usimg 2 hosting packages. Their service is excellent and super fast. Thanks & Greatly Appreciated


I've been hosting my websites with Sitevalley for more than 6 years. Very satisfied with the services and reliability they provide, competitive prices, almost no downtime, fast and knowledgeable customer support.


I have been using side valley for a couple of years now and have to say I am very happy with the service they offer.I use many Hosting services but site valley stands out in front. Reliable service, great support.I don't normally leave reviews but felt I wanted to for this service as it has been fantastic


I didn't want to review so soon on into taking out hosting with site valley but I feel obliged because their customer service is outstanding, second to none, every time I had an issue it was sorted immediately. I would highly recommend Site Valley.


I have been with Sitevalley for over a year and it's the best hosting I have EVER used. And I have been through a lot of them.


The support staff are amazing, and it's clear that they have a passion for hosting websites. I've rather enjoyed this webhosting company and it's stability for the price is bar-none, amazing.


My collegue adviced me to use SiteValley as a reliable hosting provider with great prices, professional and fast Customer Service. My experience with SiteValley was exactly the way I was promised.


I have been with SiteValley for many years, and plan to stay with them for many more. Customer support is very responsive and knowledgeable.
SiteValley.com is rated 4.8 / 5 based on 329 Reviews »

© 2001 – 2026 SiteValley.com. All Rights Reserved.